
As an Admin, you can edit Master Templates to ensure changes are applied across all users on the platform. Any edits made to a Master Template will be reflected for everyone who uses that design.
By properly setting up Image Replace and Text Replace, any time a user selects a property when creating a design, the property details will automatically populate into the template.
Access the Master Template
- Go to your Dashboard.
- Locate the design you want to edit.
- Hover over the design and click the three dots (⋯).
- Select Edit Master Template.
- Once the template opens, you can edit both text and images.
Setting Up Image Replace
For images to be automatically replaced when a user creates a new design, the image area must be configured as an Upload Zone.
For designs that include agents, the Image Replace fields may also offer Agent Photo or Partner Photo as options, in addition to property images. The example below uses a property image, but the same steps apply to any image field.
Enable Upload Zone
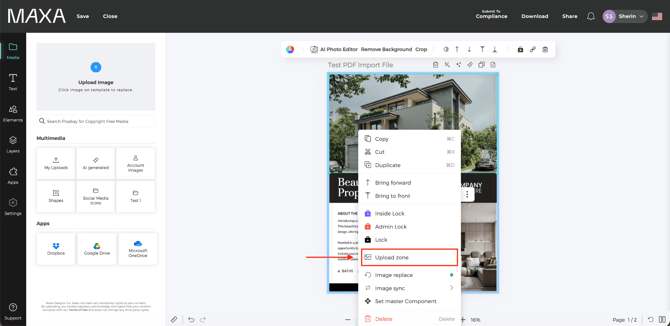
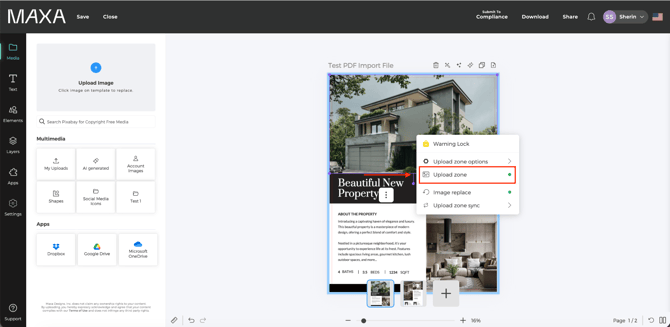
- Right-click on the image.
- Confirm that Upload Zone has a green dot.
- If it does not, click Upload Zone to activate it.
- The green dot indicates it is correctly set.
Assign Image Replace Order
- Right-click on the image again.
- Select Image Replace.
- A menu will appear on the right side.
- Assign:
- Image 1 for the first image
- Image 2 for the second image
- Continue sequentially for all images in the design
This ensures images populate in the correct order when a new design is created.
Setting Up Text Replace
For text to auto-populate (price, address, description, bathrooms, etc.), each text box must be configured as a Text Replace element and linked to the correct data field.
Enable Text Replace
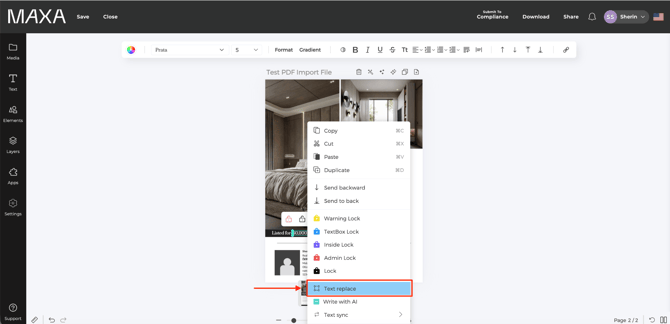
- Right-click on the text box.
- Make sure Text Replace has a green dot.
- If not, click it to activate.
Assign Text Criteria
- After enabling Text Replace, a menu will appear on the left side.
- Review the Replace Fields available for that text box.
- The active Replace Field will be marked with a green dot.
- Examples:
- Description
- Price
- Number of bathrooms
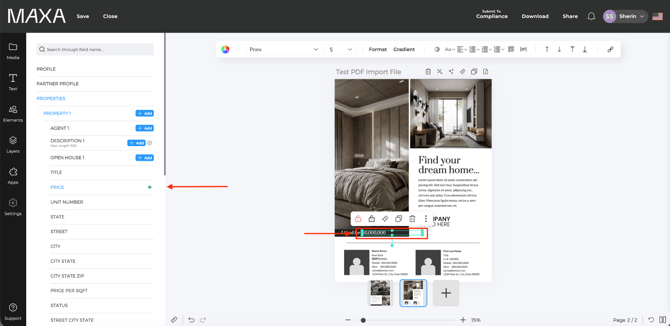
Each text box must be assigned to the correct Replace Field to ensure the right information appears in the final design.