
It works with three types of elements:
- Text boxes: great for things like a property address, agent name, or phone number that appears more than once.
- Images: perfect for keeping a listing photo consistent across multiple spots in the same design.
- Shapes: useful for keeping a colored shape or graphic element consistent across pages.
The steps below use text as the example, but the process is exactly the same for images and shapes. Just right-click on the element type you want to sync and you will see the matching option: Text Sync, Image Sync, or Shape Sync.
How it works
You create a sync group and add text boxes to it. The first text box you use to create the group becomes the primary. Its content automatically fills in any other text box you add to that group.
Once linked, editing the text in any box in the group will update all the others instantly.
Create a sync group
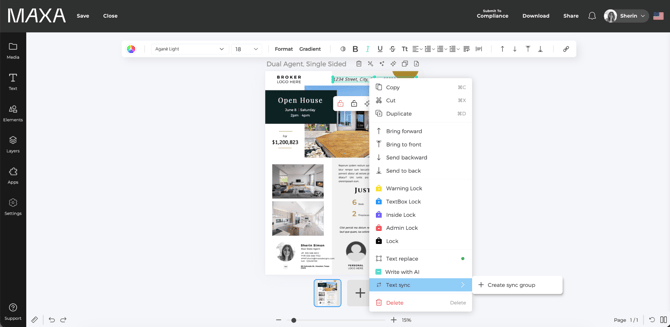
- Open your design and right-click on the text box you want to start with.
- Select Text Sync, then select Create sync group.
- Give the group a name (for example: Address, Agent Name, Phone Number) and click Save.
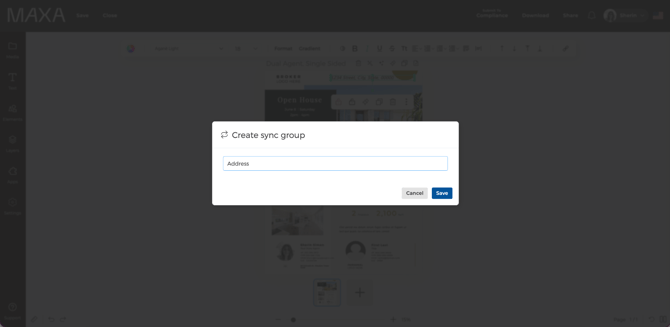
That text box is now the primary. A small sync icon will appear on it to let you know it's part of a group.
Add more text boxes to the group
- Right-click on any other text box you want to link.
- Select Text Sync, then choose the group name you just created.
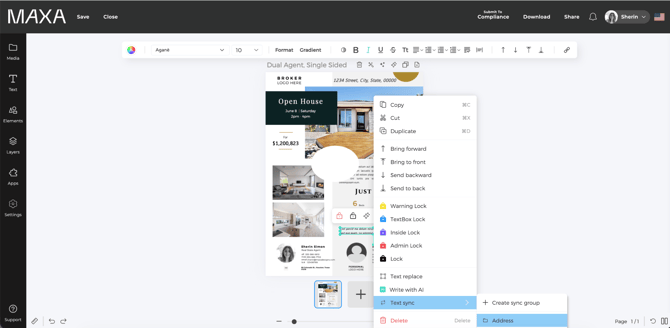
That text box will instantly update to match the content of the primary. Repeat for as many text boxes as you need.
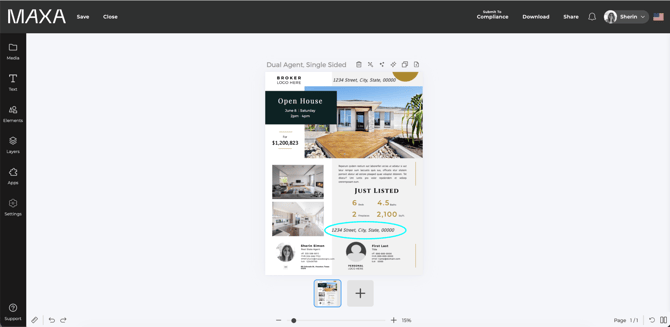
Tip: You can link elements across different pages of the same design. Just right-click and assign them to the group the same way.
Remove an element from a group
If you want an element to stop syncing, right-click on it, select the sync option (Text Sync, Image Sync, or Shape Sync), then click the group name (it will have a small dot next to it). This removes that element from the group. Everything else stays linked and nothing gets deleted.
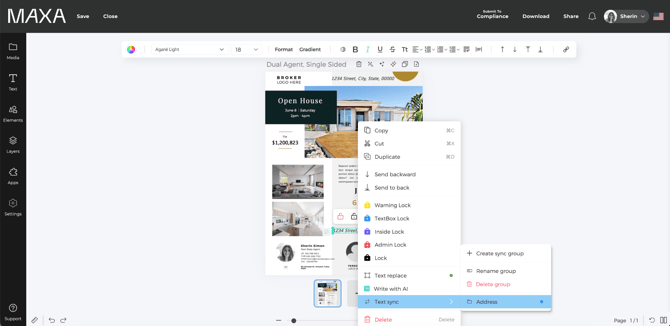
Rename or delete a group
You can manage a group from any element that belongs to it. Right-click the element, select the sync option, then choose Rename sync group or Delete sync group.
Deleting a group removes the link between all the elements in it, but it does not delete anything from your design. Everything stays exactly as it was.
Good to know
- Content Sync only works within a single design. Groups do not carry over to other designs.
- Text, image, and shape sync groups are separate from each other. A text sync group will only show up when you right-click a text box, and the same goes for images and shapes.
- You can have multiple sync groups in one design, for example one for the address, one for the agent name, and one for the listing photo.
- When you add an element to a group, it will take on the content of the primary. Make sure your primary has the right content before adding others.
- If you need to change the name of a group later, you can do that at any time without affecting the linked elements.