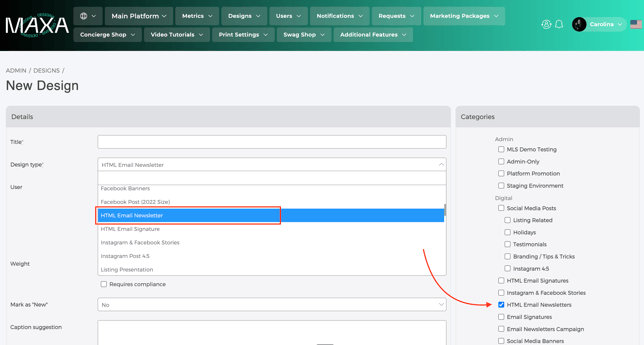
Go to your Admin Panel → Designs → Create a new design. Make sure the design type contains "HTML" and pick the category where you want the template to live, click then on create design on the bottom of the page.
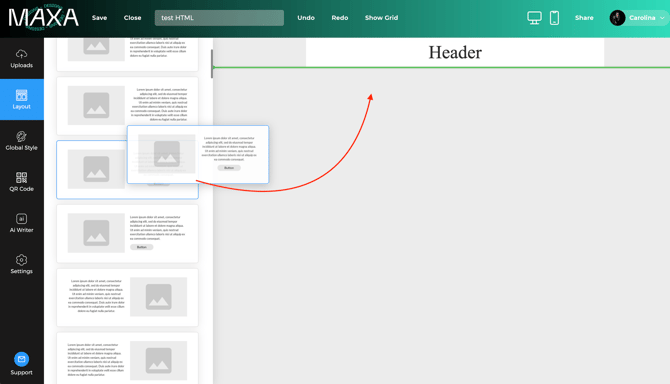
You´ll be redirected instantly to the HTML designer. From your left panel, click on the section of your desire and pick the design of that section (header, text, image, text+image...), then drag and drop pre-built “Layouts” to efficiently create your design using intuitive, modular building blocks, you´ll se a green line indicating where that section will be placed. If you just click on the element from the section, this will be placed on the bottom of the design.
You can edit each element by clicking on them. A right side panel will open to adjust the text or image depending on what you clicked. When clicking on a text, a blue quick option menu will appear right on the top of the text box.
There is also an arrow on each element to view the scope (element → section → column). Use this to make changes just to that element, section, or column.
- Open Admin → Design → New design.

- Choose Title and Design Type (HTML) → Choose category and click on Create design
- Drag & drop premade “Layouts” to build the design quickly — think of them as reusable blocks. The green line will indicate where the new section will be placed.
- Edit each element: click the arrow once or multiple times to change from element to section.

- Preview your work using the desktop and mobile preview icons in the top-right header of the designer.

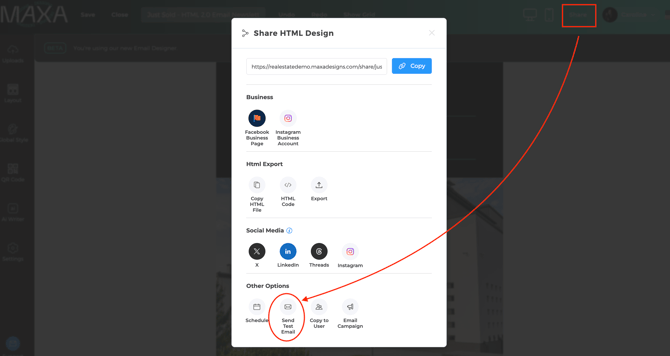
- Send a test email: Click Share → Send test email, enter your email, and click Send Email. Check the newsletter in your inbox.
- Save as a template (optional): In the left panel, under Settings, choose Save as Template.