![61e9d2f5062816cb436dec7a_maxa logo 2.png]](https://support.maxadesigns.com/hs-fs/hubfs/61e9d2f5062816cb436dec7a_maxa%20logo%202.png?height=31&name=61e9d2f5062816cb436dec7a_maxa%20logo%202.png)
Pro Tip: For the best results, we highly recommend uploading PDFs created in Adobe InDesign. Files exported from other software applications may not preserve the same level of fidelity and precision.
Important Note About Bleeds: Design PDFs should not contain bleeds. For example, a 1-sided portrait flyer should be 8.5" x 11", not 8.75" x 11.25". If your PDF includes bleeds, the system will not recognize the design type and will create an error.
Before you begin, we suggest taking a quick look at the PDF Prep Guide and the tutorial video located right next to the importer. These resources cover recommended export settings and common issues to avoid.
Step 1: Upload Your PDF File
First, let's get your file into the system.
- Log in to your Admin Panel.
- Navigate to Designs and select Designs from the menu.
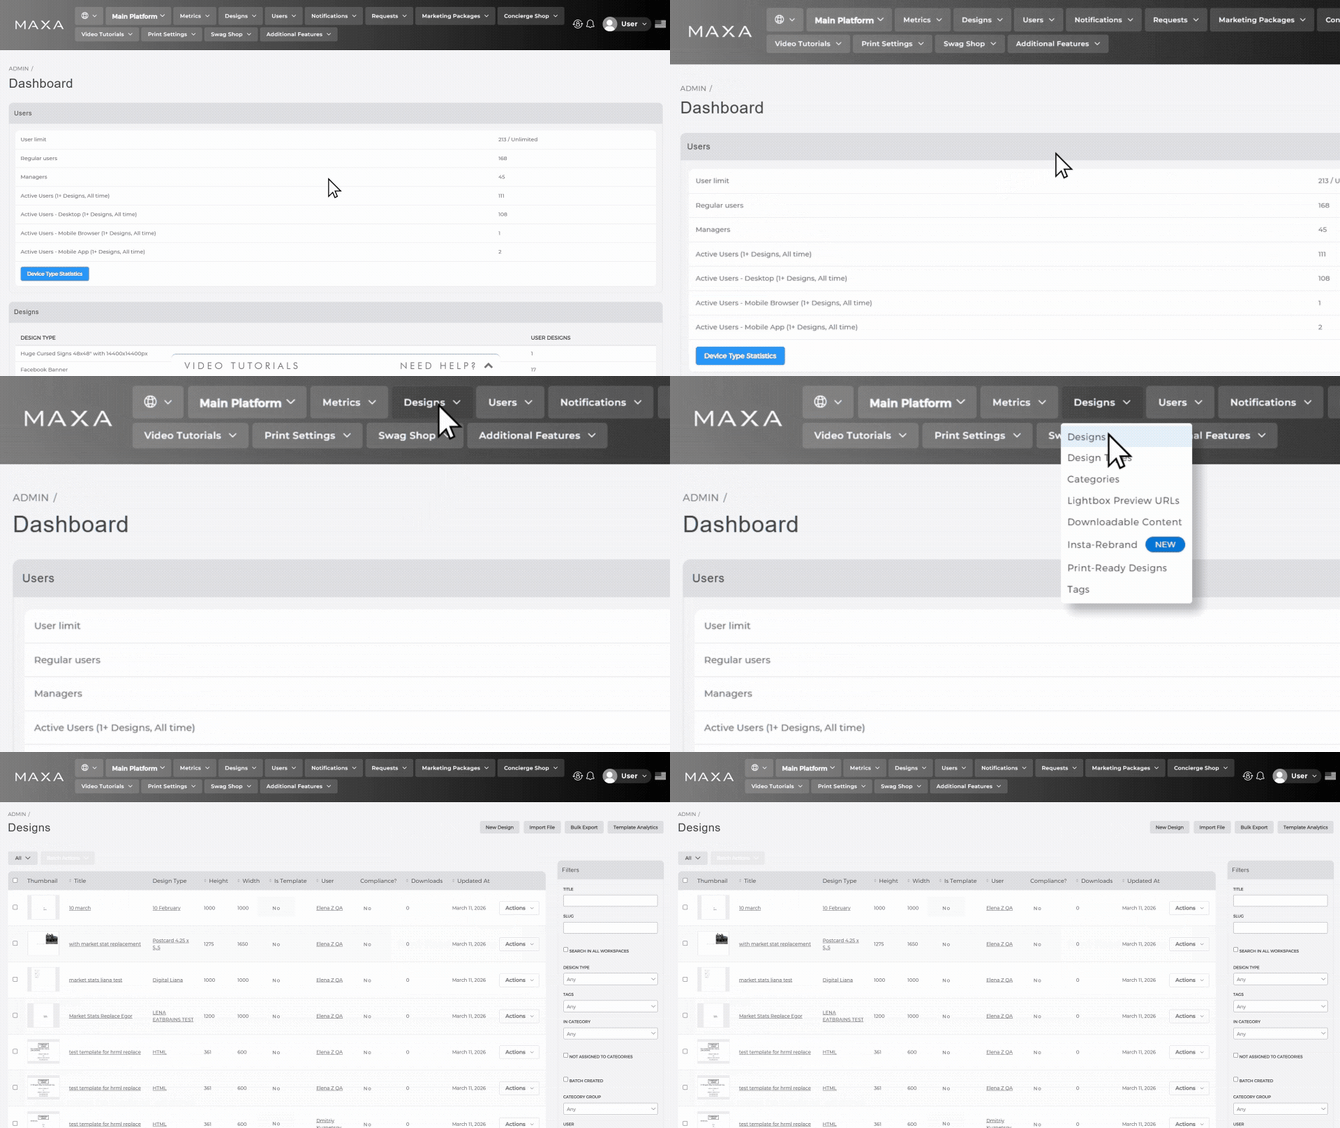
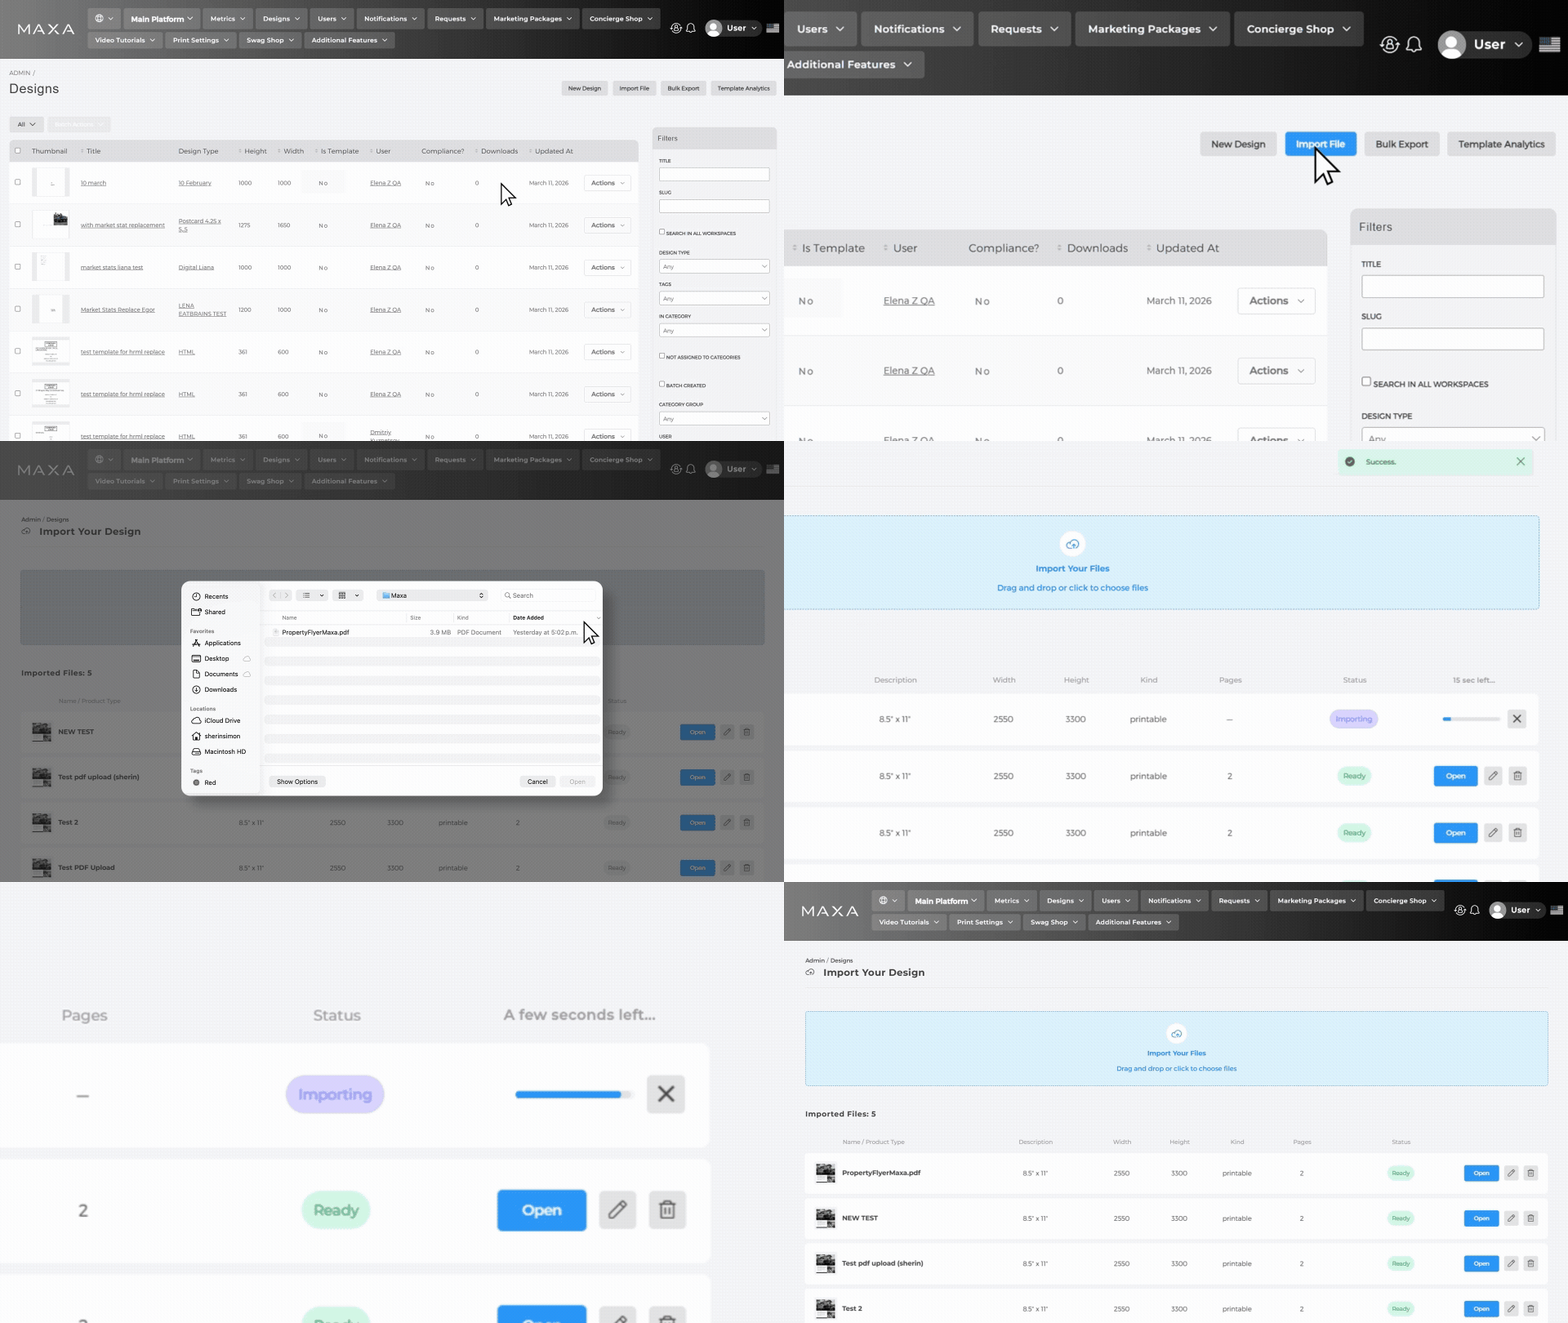
- Click the Import File button located in the top-right corner.
- In the upload window that appears, you have two options:
- Drag and drop your PDF directly into the upload area.
- Click the upload box to browse and select the file from your computer.
- Wait a moment for the upload to complete. Once finished, your file will appear in the Imported Files list. The system will automatically identify the design type.
Step 2: Edit and Configure Your Template
Now it's time to set up and configure your template before making it available to users. After opening your design in the Designer, you can review and set up the interactive elements.
Within the Designer, you can easily adjust:
- Upload zones: Areas where users can drop in their own images or graphics.
- Text replacements: Define which fields should auto-populate with user or listing data.
- Safe zones and bleeds: Ensuring your design prints perfectly.
- Layout adjustments: Making any final tweaks to the design structure.
These configurations are what make your design function smoothly as a template for your end users.
For detailed, step-by-step instructions on configuring these specific elements, please check out our full article on How to Set Up a Template.
Step 3: Configure Your Master Template in the Admin Panel
Once you've configured all the elements in your design, the final step is to convert it into a Master Template and assign it to a category. This makes it available for your users to access and customize their own version.
Steps
- In your Admin Panel, click the Designs dropdown menu at the top.
- Select Designs from the dropdown.
- Find your design and click Actions.
- Select Edit.
- Make sure " Is template " is checked, and assign it to a category and subcategory if necessary.
- In this step, you can also change your design name and activate compliance if it applies.
- Scroll down and click Update Design.
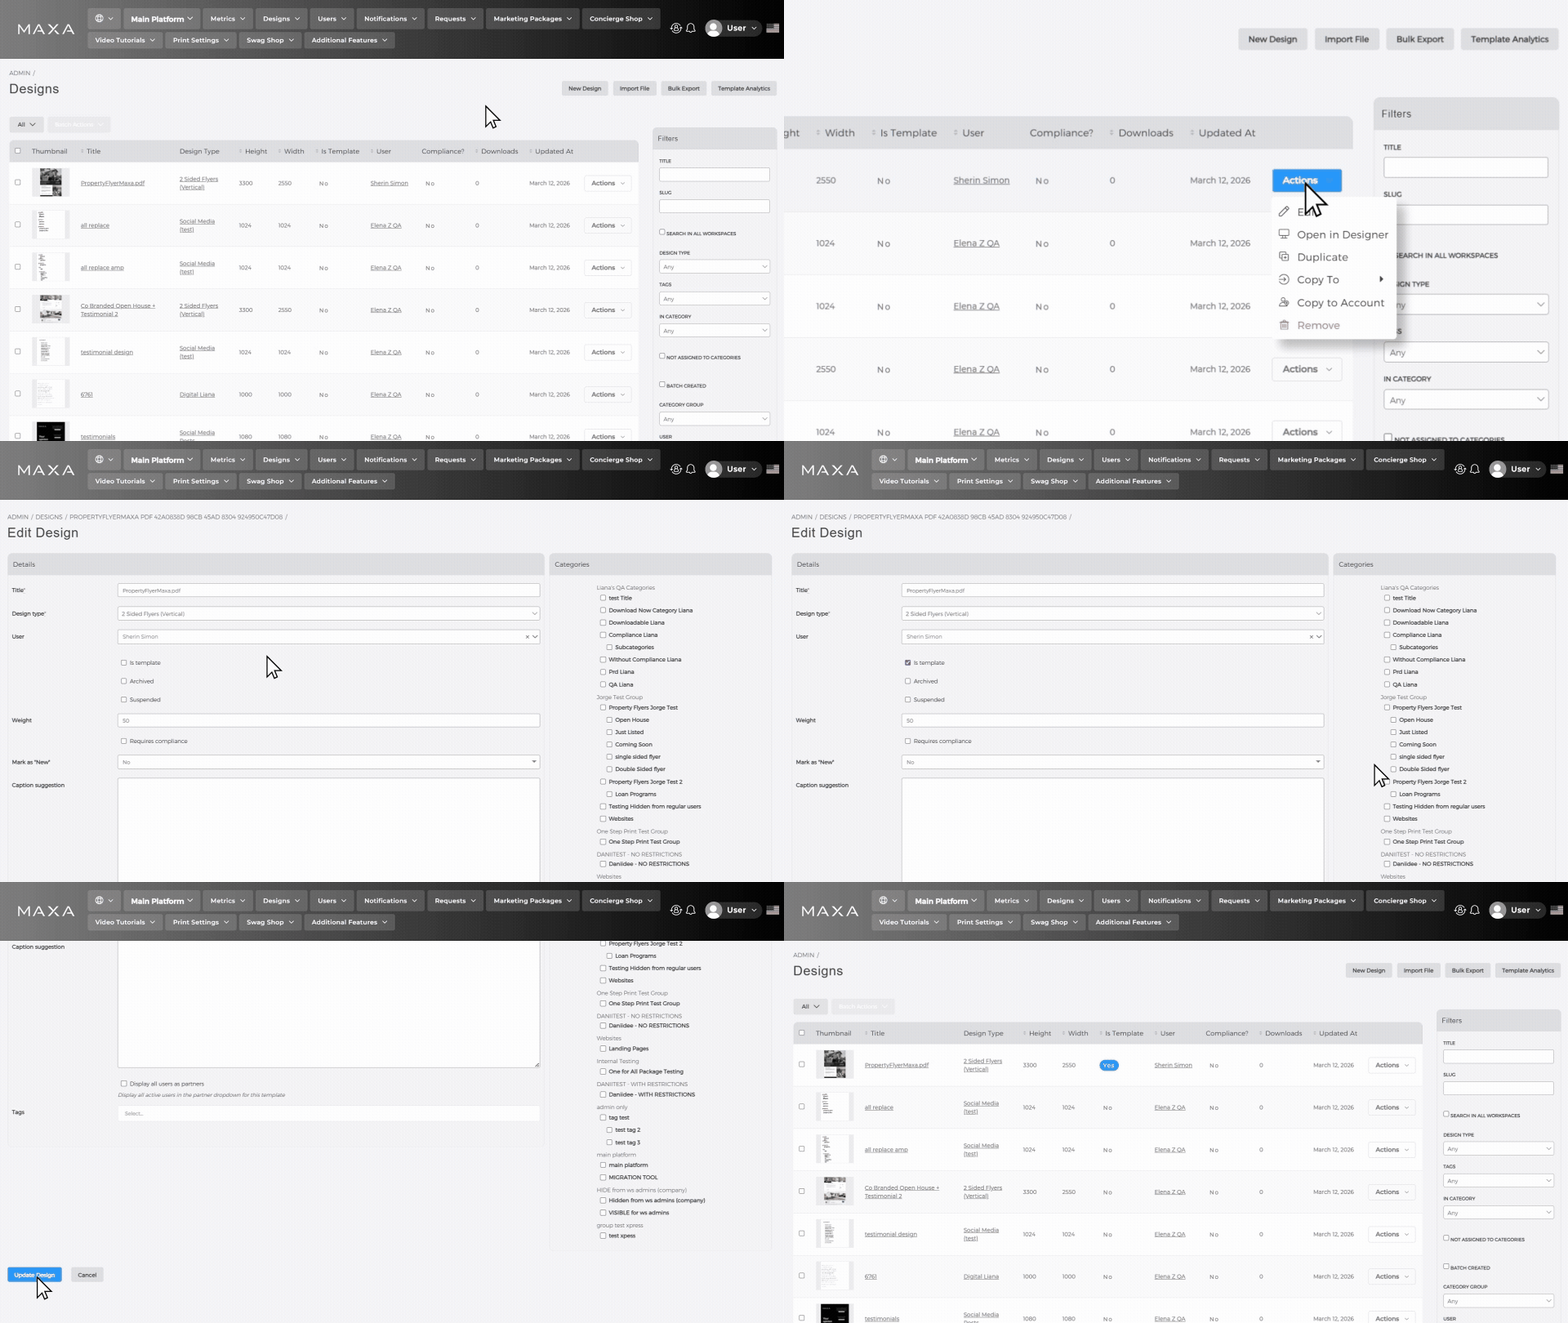
Your design is now available as a Master Template in your chosen category!
If the design is customized for a specific user, you can create a special category for them and assign it as available only to that user. In this case, you don't need to mark it as MT — it depends on what you're trying to achieve.