![61e9d2f5062816cb436dec7a_maxa logo 2.png]](https://support.maxadesigns.com/hs-fs/hubfs/61e9d2f5062816cb436dec7a_maxa%20logo%202.png?height=31&name=61e9d2f5062816cb436dec7a_maxa%20logo%202.png)
You can turn any uploaded, created from scratch, or existing design into a template. This works for master templates or your regular designs.
1. Get Started: Open Your Design
To open your design in the Designer:
- For existing designs (uploaded or created): Go to Admin Panel > Designs > Designs. Find your design, click Actions, then Open in Designer.
- For designs from an imported file: Go to Admin Panel > Designs > Designs. Click Import File (top-right), scroll to your imported PDFs, find your file, and click Open.
- For Master Templates: Go to Admin Panel > Designs > Master Templates. Find your template, then click Edit Master Template.
2. Set Up Your Template Fields
Now you're in the Designer! Here's how to tell the platform what to fill in automatically:
- Photos to the Edge (Bleeds): If photos need to print to the edge (bleed), go to Settings > Preferences (left panel) and click Enable Safe Zones and Bleeds. Anything that bleeds should extend into the blue zone.
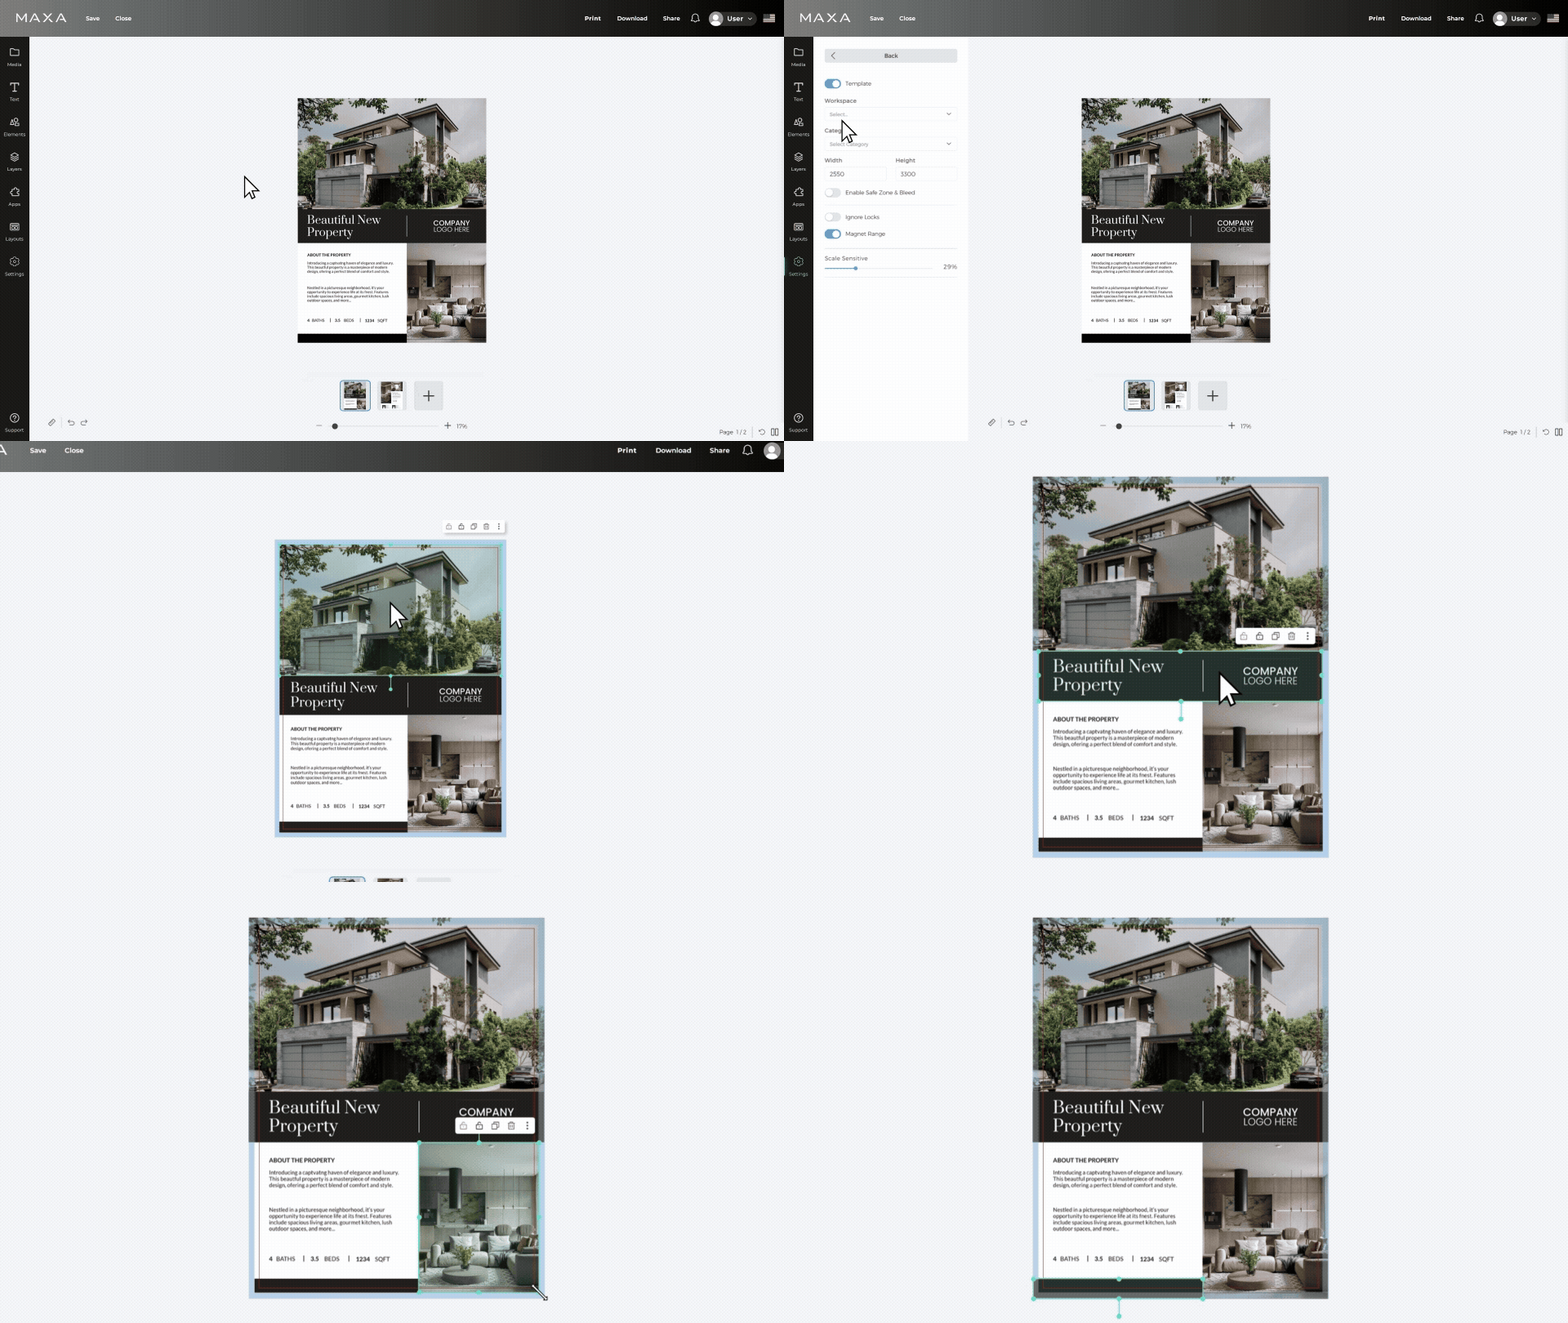
- Assign Info (Text & Images): This is for Agent/Partner details, MLS property info, and Logos.
-
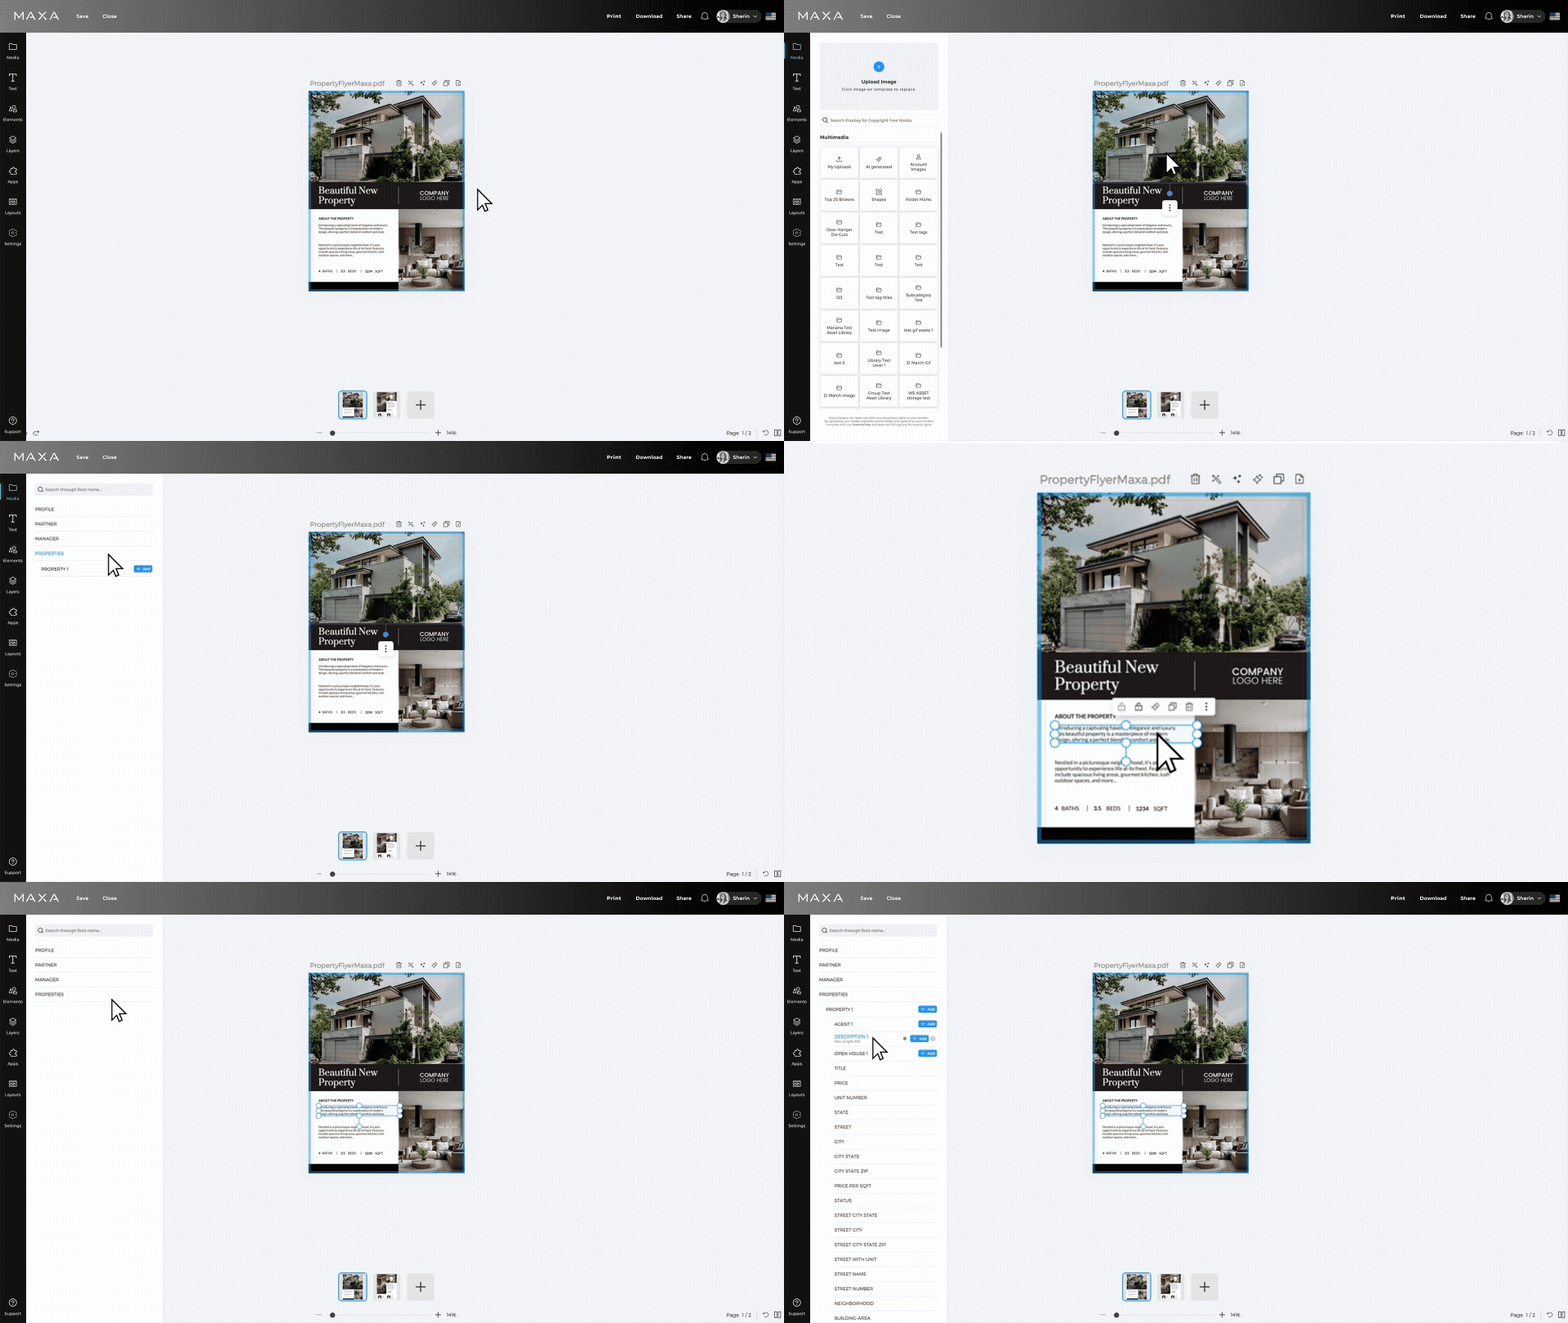
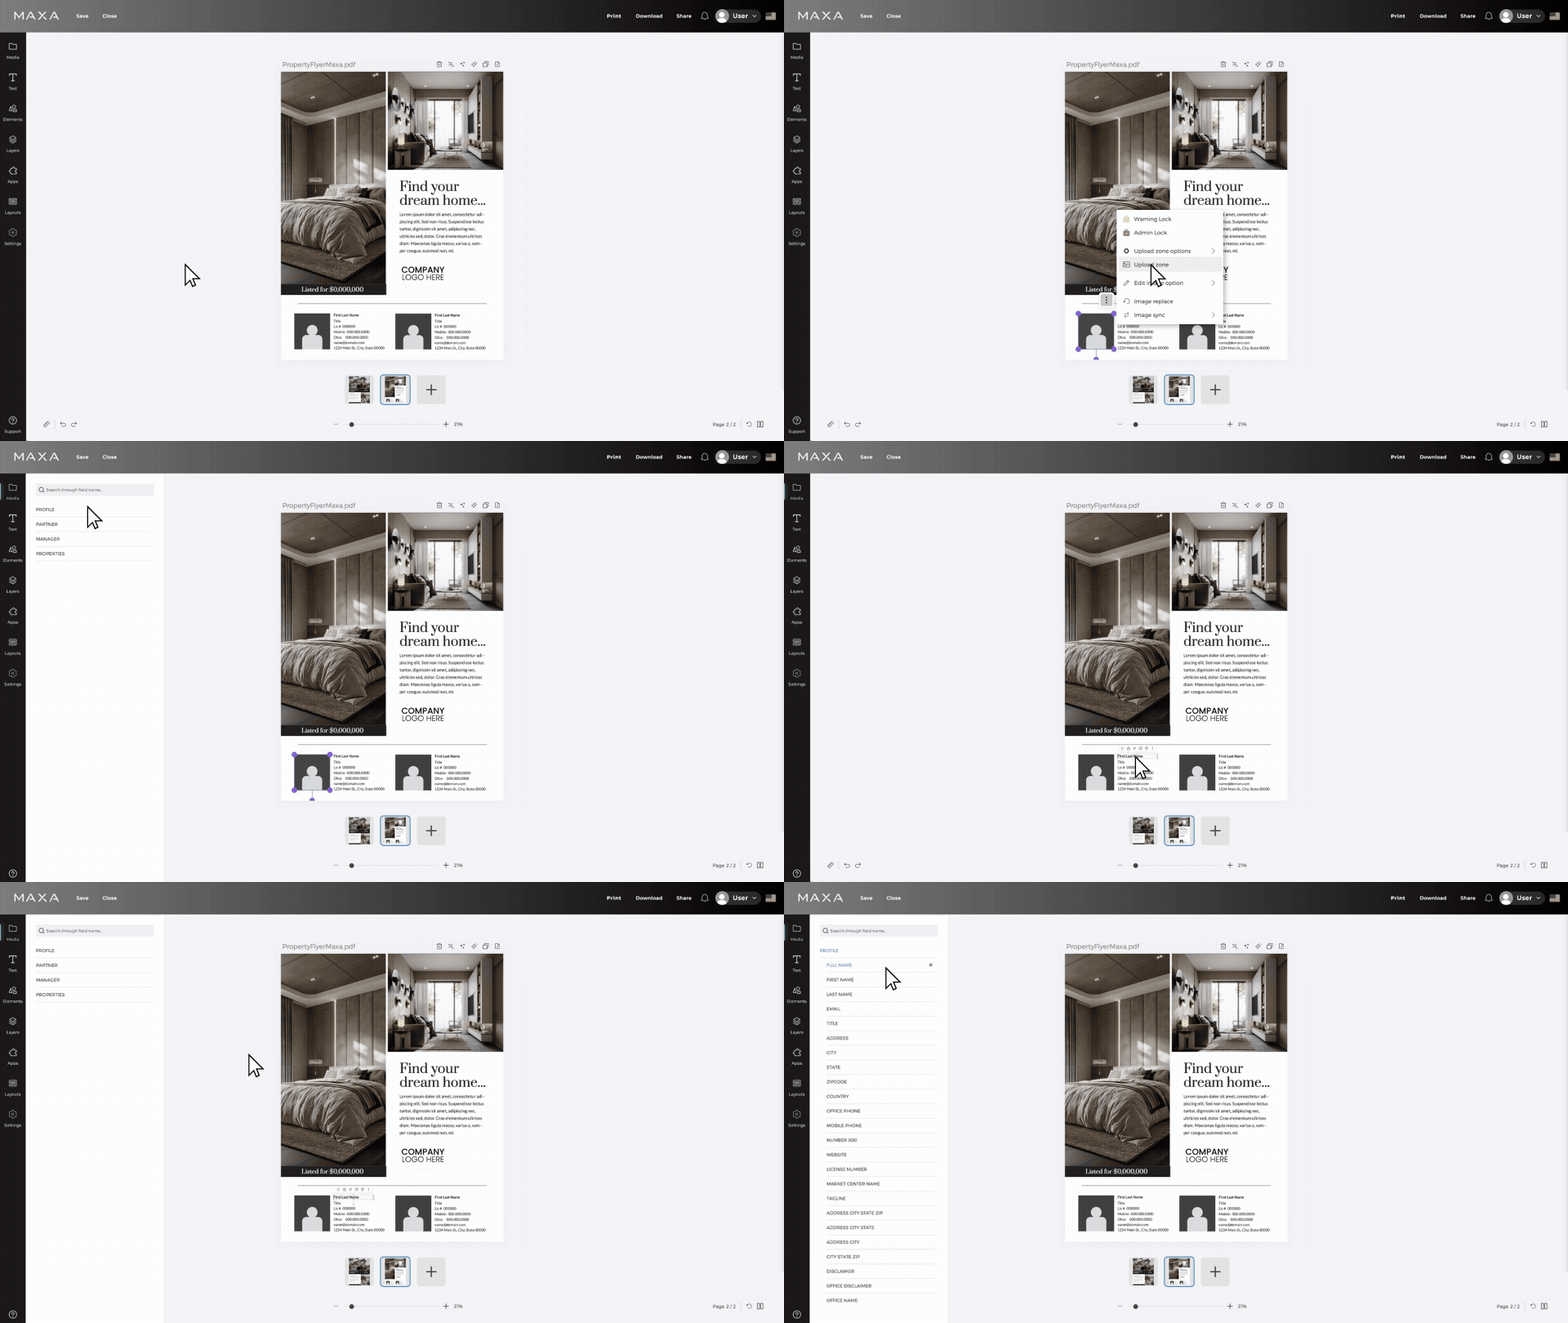
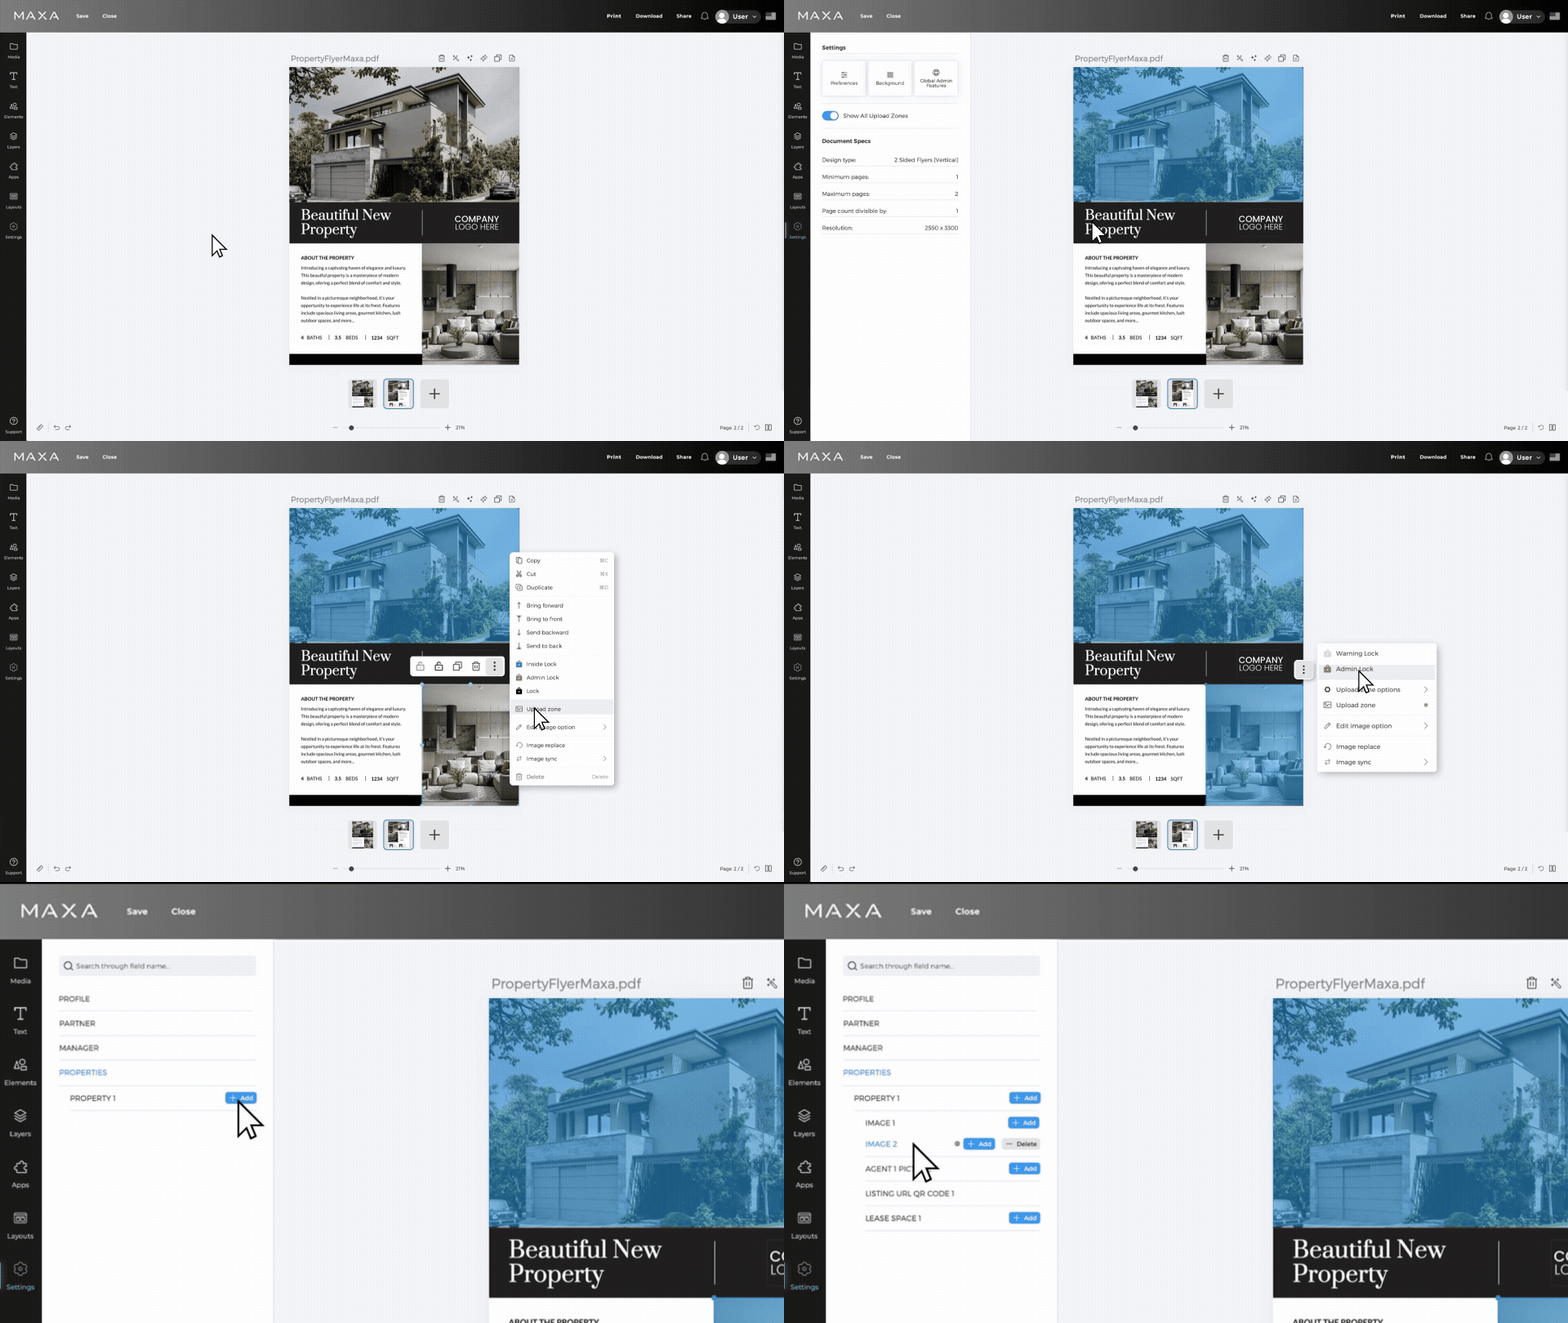
- Right-click on a text box or image you want to assign a Smart Field to.
- Choose Text Replace (for text) or Image Replace (for images).
- In the left panel, pick the type of info you want:
-
-
- Agent/Partner Info (Name, Photo, Email, Logos): Choose Profile (for agent/personal logos) or Partner (for co-agent). Then pick the field (e.g., "Agent Name," "Profile Photo," "Office Logo").
- More MLS photos: After "Image 1," click + Add for "Image 2," etc. (up to 20 per property!). This also applies to multiple properties if your template uses them.
- Shorten long descriptions: For a long description field, find "Description" in Text Replace, click the settings wheel, and set a max character limit.MLS Property Info (Photos, Price, Address): Choose Properties > Property 1. Then pick the field (e.g., "Image 1," "Price," "Address")
- Agent/Partner Info (Name, Photo, Email, Logos): Choose Profile (for agent/personal logos) or Partner (for co-agent). Then pick the field (e.g., "Agent Name," "Profile Photo," "Office Logo").
-
To review all the assigned Smart Fields go to Settings (left panel) > Click Show All Upload Zones. This highlights anything set with a Smart Field in green.
Text Box Tips:
- Format Text: Click the text box (do not highlight text within the box) > Use the Format tab to change font, spacing, alignment.
- Pro Tip: Make text boxes as wide as your design allows to avoid messy wrapping or text going off the page!
3. Organize & Lock Things Down
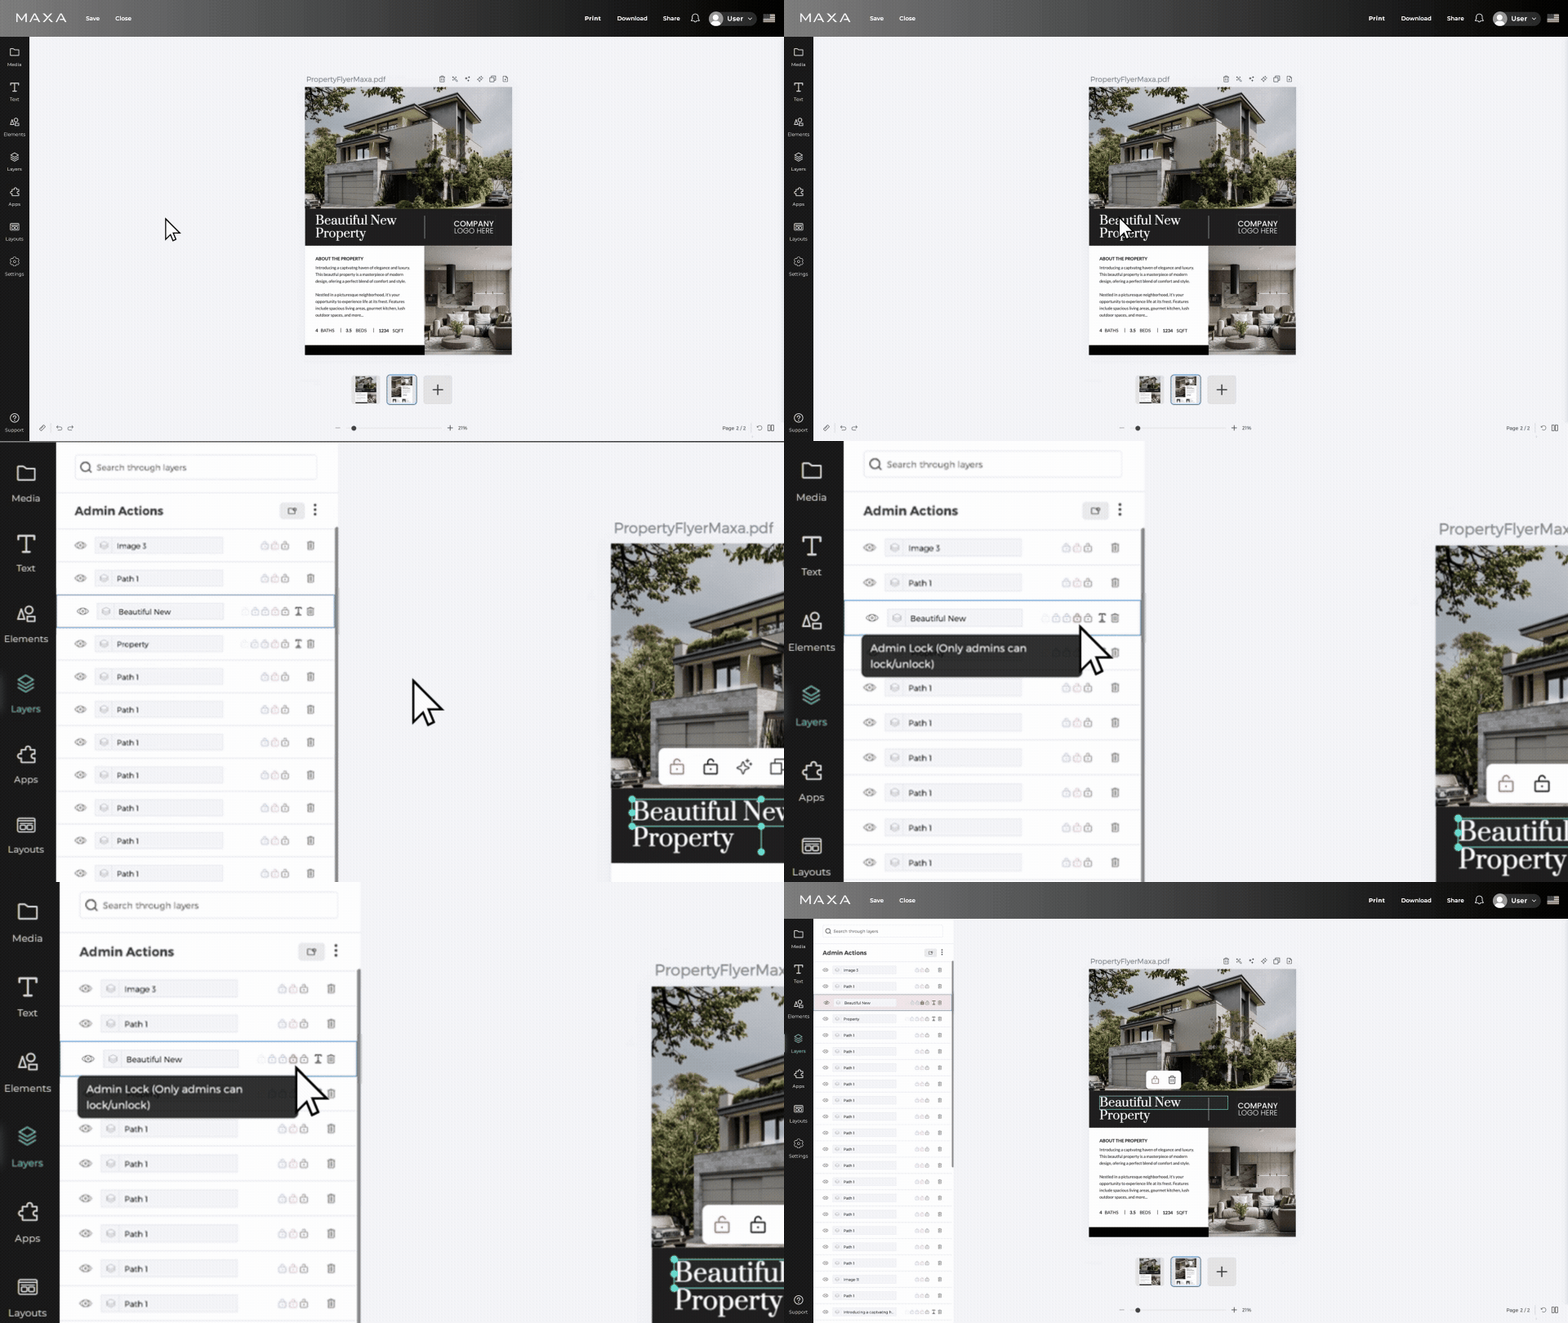
Use the Layers Panel to manage your design pieces. You can rename, delete, or group elements.
- Locking Elements: Locks control what users can do with the layer:
- Grey Lock: Users can unlock/lock the layer.
- Red Lock: Only you (the Admin) can unlock/lock the layer.
- Purple Lock: Users can move/resize the layer, but can't change its content or delete it.
- Yellow Lock: A warning that prompts users to review the layer if it's not customized.
Pro Tip: Smart Field zones can be locked and still work correctly! Use Grey Locks for most background elements, but consider locking Smart Field zones too if you want to prevent users from accidentally moving or resizing them.
4. Verify & Go Live!
- Double-Check your fields: Go to Settings > Click Show All Upload Zones. Green highlights mean it's set up correctly! If something isn't green, check it.
- Save & Publish: Click Save (fix spell-check errors). Then, go to Admin > Designs, find your template, click Actions > Edit, check Is Template, Pick a Main Category and then a Subcategory (if applicable – this is important, or users won't see it!), and click Update Design.
That's it! You've successfully set up a template.
Related Articles